In this blog post, you will learn all the important steps in how to grow onions. From the materials, you need up to a detailed step-by-step guide.
First things first let’s get to know our plant before starting. Is a common mistake to throw the seeds and hope to see some progress not knowing what exactly the plants needs.
Part 1 – Knowing the Plant
When to Plant – How to grow onions
The onions are a cold/spring-season crop, they resist the cold pretty well and are ready to harvest by mid-summer, thanks to the sturdiness of the plant is a very versatile crop to plant. Seeding/Planting can go from March-April and we can expect to harvest in July/August. The exact recommended planting window will be available in the seed packing label. Nevertheless, there is a concept you need to understand, and that is hardiness.
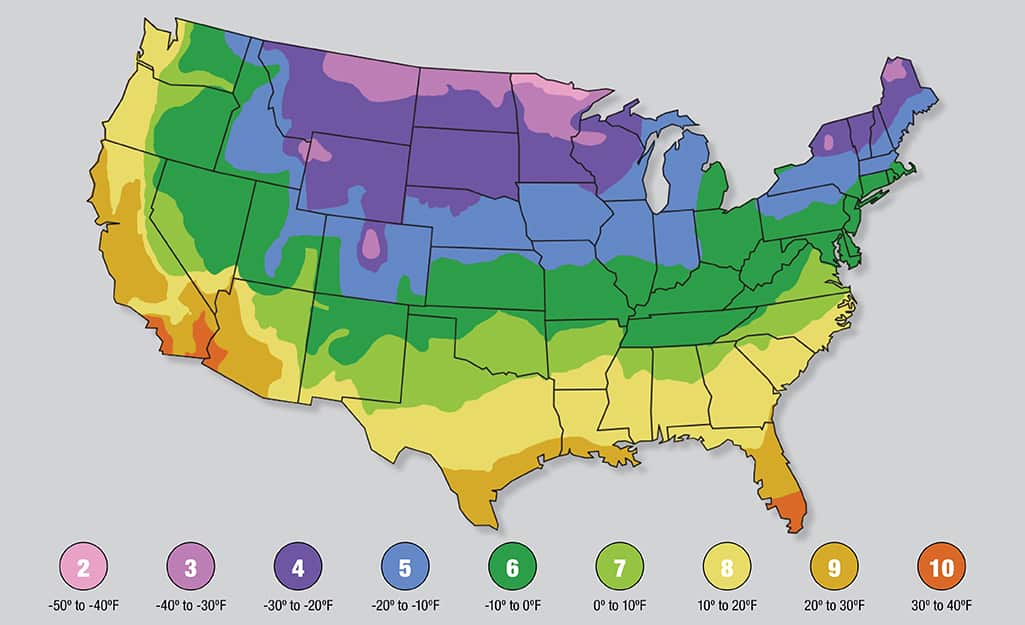
A hardiness zone is a geographic area defined to group a certain range of climatic conditions relevant to plant growth.
Look at the map below and see in which zone you are located this will help later decide what type of seed you will use.

Besides classifying for their hardiness, onions have a special classification. They can be Short-Long-Intermediate days. This specifies the amount of daylight needed to form a good bulb.
Long-day onions need around 14 hours of daylight or more to form a bulb. They will no form a bulb if the hours of daylight don’t reach 14. This kind of onion is good for the northern part of the country, the Walla Sweet Spanish and the White Sweet Spanish are great options.
Intermediate-day onions are those that form a bulb with 12 to 14 hours of daylight, they are less sensitive to receiving fewer hours. Two great options, are Cabernet and Red Amposta.
The short-day onion will only need 10 to 12 hours of daylight exposure. Is great for the southern part of the country. Red Burgundy and Grano.
Now that you have a good knowledge of how onions are classified. You need to know that the optimal germination temperature is around 55/58 °F and for vegetative development the onion needs temperatures around 55 F° to 76 °F, however, the onion is a very tolerant and resistant plant it has a wide range of working temperatures and it can withstand frosting like a champ, so don’t get too worried if you have a few days of frosting.
Soil
The onion prefers well-drained, slightly acidic, fertile soils. Since is the bulb that is being consumed it is important to take care of the soil and be sure to not have a poor drain area. Raised beds are recommended to grow onions since the soil is prepared and finely loose helping the development of the bulb. Rocky and compacted soil will affect directly bulb formation.

Part 2 – Materials – How to grow onions
Seeds or Bulb Sets
The starting point for this crop can be 2, seeds or smaller bulbs. The smallest bulbs you can find on the market are generally at the base of the shelves since no one wants them, they are good since they already formed a small bulb, you are just going to finish them.
Regarding the seeds we have an immense variety, they come in different sizes and colors. Here is the detail of some more common varieties.
Walla Sweet Spanish: Produces sweet brown-skinned white onions of a large size. Long day variety. Good for fall or early spring sowing in the north. Hardiness Zones: 3, 4, 5, 6, 7, 8, 9, 10, 11, 12
White Sweet Spanish: These are long-day onions sweet and large. Good storage quality. Produces a white skin onion. USDA Zones: 3, 4, 5, 6, 7, 8, 9, 10, 11, 12
Red Grano: Rich in color and flavor. These onions tend to be medium to large in size and have a mild, to sweet flavor. Hardiness Zones: 3, 4, 5, 6, 7, 8, 9, 10, 11, 12.
Cabernet: Cabernet’s produces a globe shape onion with burgundy skin. Intermediate-day onions. Hardiness 4-5-6-7-8.
Red Amposta: This intermediate-day onion produces large, reddish-purple, globe-shaped onions with pretty red and white rings filled with a sweet flavor. Grows better in the middle of the US. Hardiness 4-5-6-7-8.
Mulching
The onion benefits greatly from the mulching, it will prevent excessive evaporation of water, achieving a longer irrigation interval as well as the appearance of weeds. It could be plastic or use compost as mulch, this last one will help to incorporate nutrients into the soil.
Part 3 – Planting – Cares – Harvest
Planting
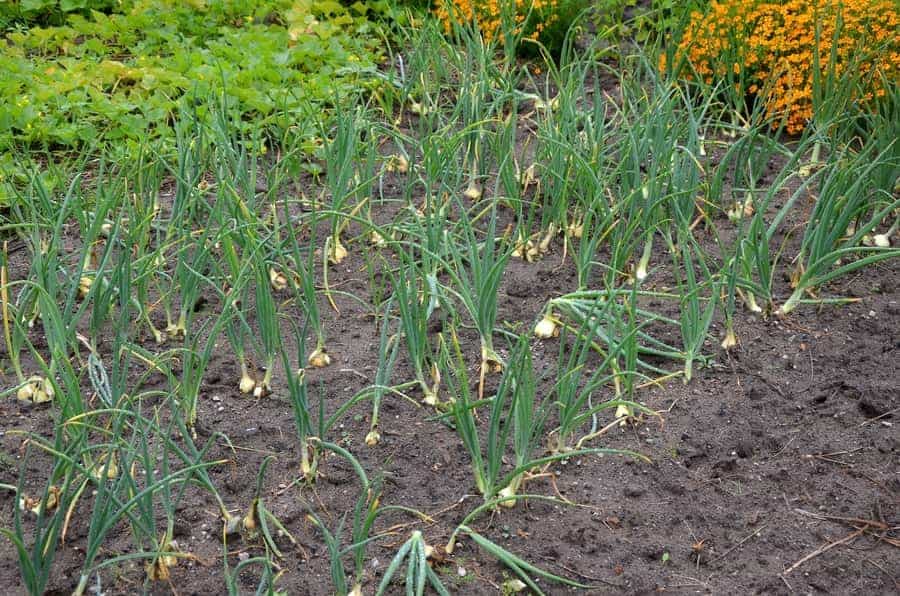
Onions can be done in two ways. Directly from the seeds or using sets that are small in size onions. The sets of onions are a good option to speed up the process and also can be used if you don’t have good-quality seeds. And since the sets already have an energy store in the small bulb it can provide an extra boost in the initial phase of the development. But don’t misinterpret, seeds are also a good option, the seed has all the necessary energy to develop healthily.
As earlier said, is recommended to use raised beds when planting onions, in both cases when planting sets or seeds the holes must be 5-6 inches (15 cm) apart from each other, and if we are doing more than 1 row spread each row 12 inch (30cm) apart, for the seeds punch a hole of around 0.5 inches (1.5/2cm) and for the sets punch a hole and bury the bulb just enough to see the top of the bulb in the edge the surface. Select a sunny area and make sure that the bed will not be shaded by other plants. Before and after planting water gently all the surface.
Pro tip: If you are looking to plant more than one time, practice plant rotation. Don’t plant the same plant in this case the onion on the same bed, by rotating you will prevent diseases.
Cares – Watering – Pruning
Watering during the morning is recommended as it prevents the bulbs from flooding, on the contrary, watering at night increases the chances that the bulb will flood and diseases could proliferate.
The irrigation must be given daily, however, if we see that the bed is still wet, you can skip for the day. Bear in mind that the onion has a fairly short and not very dense root, therefore irrigation is essential for the correct development of the bulb. If using mulch the irrigation could be minimal depending on the weather. Always check the soil before watering.
Pruning the flowers is recommended, since you want all the nutrients and energy in the formation of the bulb, leaving the flower will produce smaller bulbs.
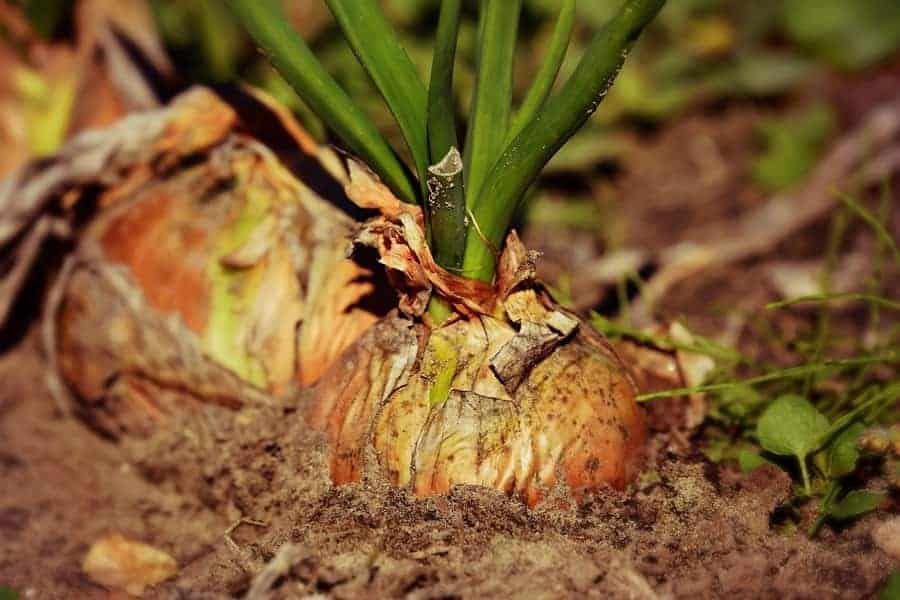
Fertilizing is recommended at the first stages 1/2 times with a 20 days interval, a good nitrogen bases fertilizer is good. Stop the process when you see the bulb emerging from the ground, this is normal, don’t cover it again with soil, and let the bulb be slightly on the edge, it needs sun.
Harvest
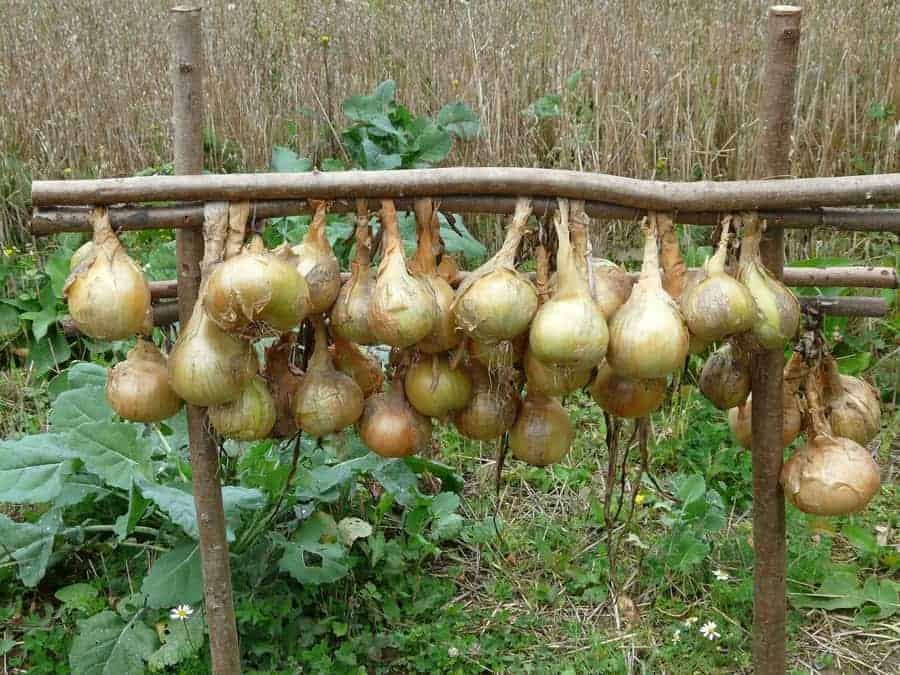
The maturing and harvest phase is essential in the onion since this will determine the life shelf life of the fruit. Spring-planted onions should be ready by mid-summer. When the onion is ready the top foliage will start to get yellow and ultimately brown and finally will fall, you can speed up the process by breaking the neck of the foliage. When the foliage is almost all brownish, carefully move the ground surrounding the bulb to start the drying process, a 1/2 day later take the bulbs and leave them above the ground for a few days to get the outer layers dry. If you want an extra dry layer, you can use a rack and leave it for a few days more in the sun.
Always always the harvest should be done in dry conditions. Harvesting in wet conditions will reduce the shelf life of the fruit due to a poor drying stage.

Taxonomy
Geeky Data
| Botanical Name | Allium cepa |
| Common Name | Onion |
| Mature Size | 2 to 3-3/4 inches in diameter (Bulb) – 15/30 inch foliage height |
| Phenology | 130/150 days |
| Light Exposure | Full |
| Soil pH | Neutral to Acidic |
| Origin | Central America |
| Soil Type | Well Drained Rich with Organic Material |
Wrap-Up – How to grow onions
Soil: Organic rich, but loose with a neutral to acidic ph.
Water: Water regularly but be careful to overdo it.
Light: At least 12h per day, full sun. Depending on the variety.
Temp: 55/77 F ideally, a little more or a little less will not make a big difference.
General Care: Watering regularly. Pruning the flower steam to avoid small bulbs. Dry correctly after harvest.

